Tested with an update from EmDash 1.0.1 to 1.1.0, using npm and the blog template on Cloudflare. Revised for EmDash 1.2.0 on 7 October 2026: I rechecked the update from 1.1.0 to 1.2.0 locally. What changed is listed at the end of the article.
In WordPress you click "Update now" in the dashboard, and a few seconds later the new version is running. In EmDash you'll look for that button in vain. That's on purpose: EmDash is code in your project, and an update is a deployment like any other change to that code.
So that I'm not just telling you how it should work, I put a fresh site with EmDash 1.0.1 on Cloudflare, updated it to 1.1.0 and then rolled it back. Here are the steps, the timings and what happens to your database along the way. If you don't have an EmDash site yet, start with getting started with EmDash.
How you know there's an update
The admin tells you. A notice at the top of the dashboard names the new version and the one you're running. The version that's live is always shown at the bottom left of the navigation.
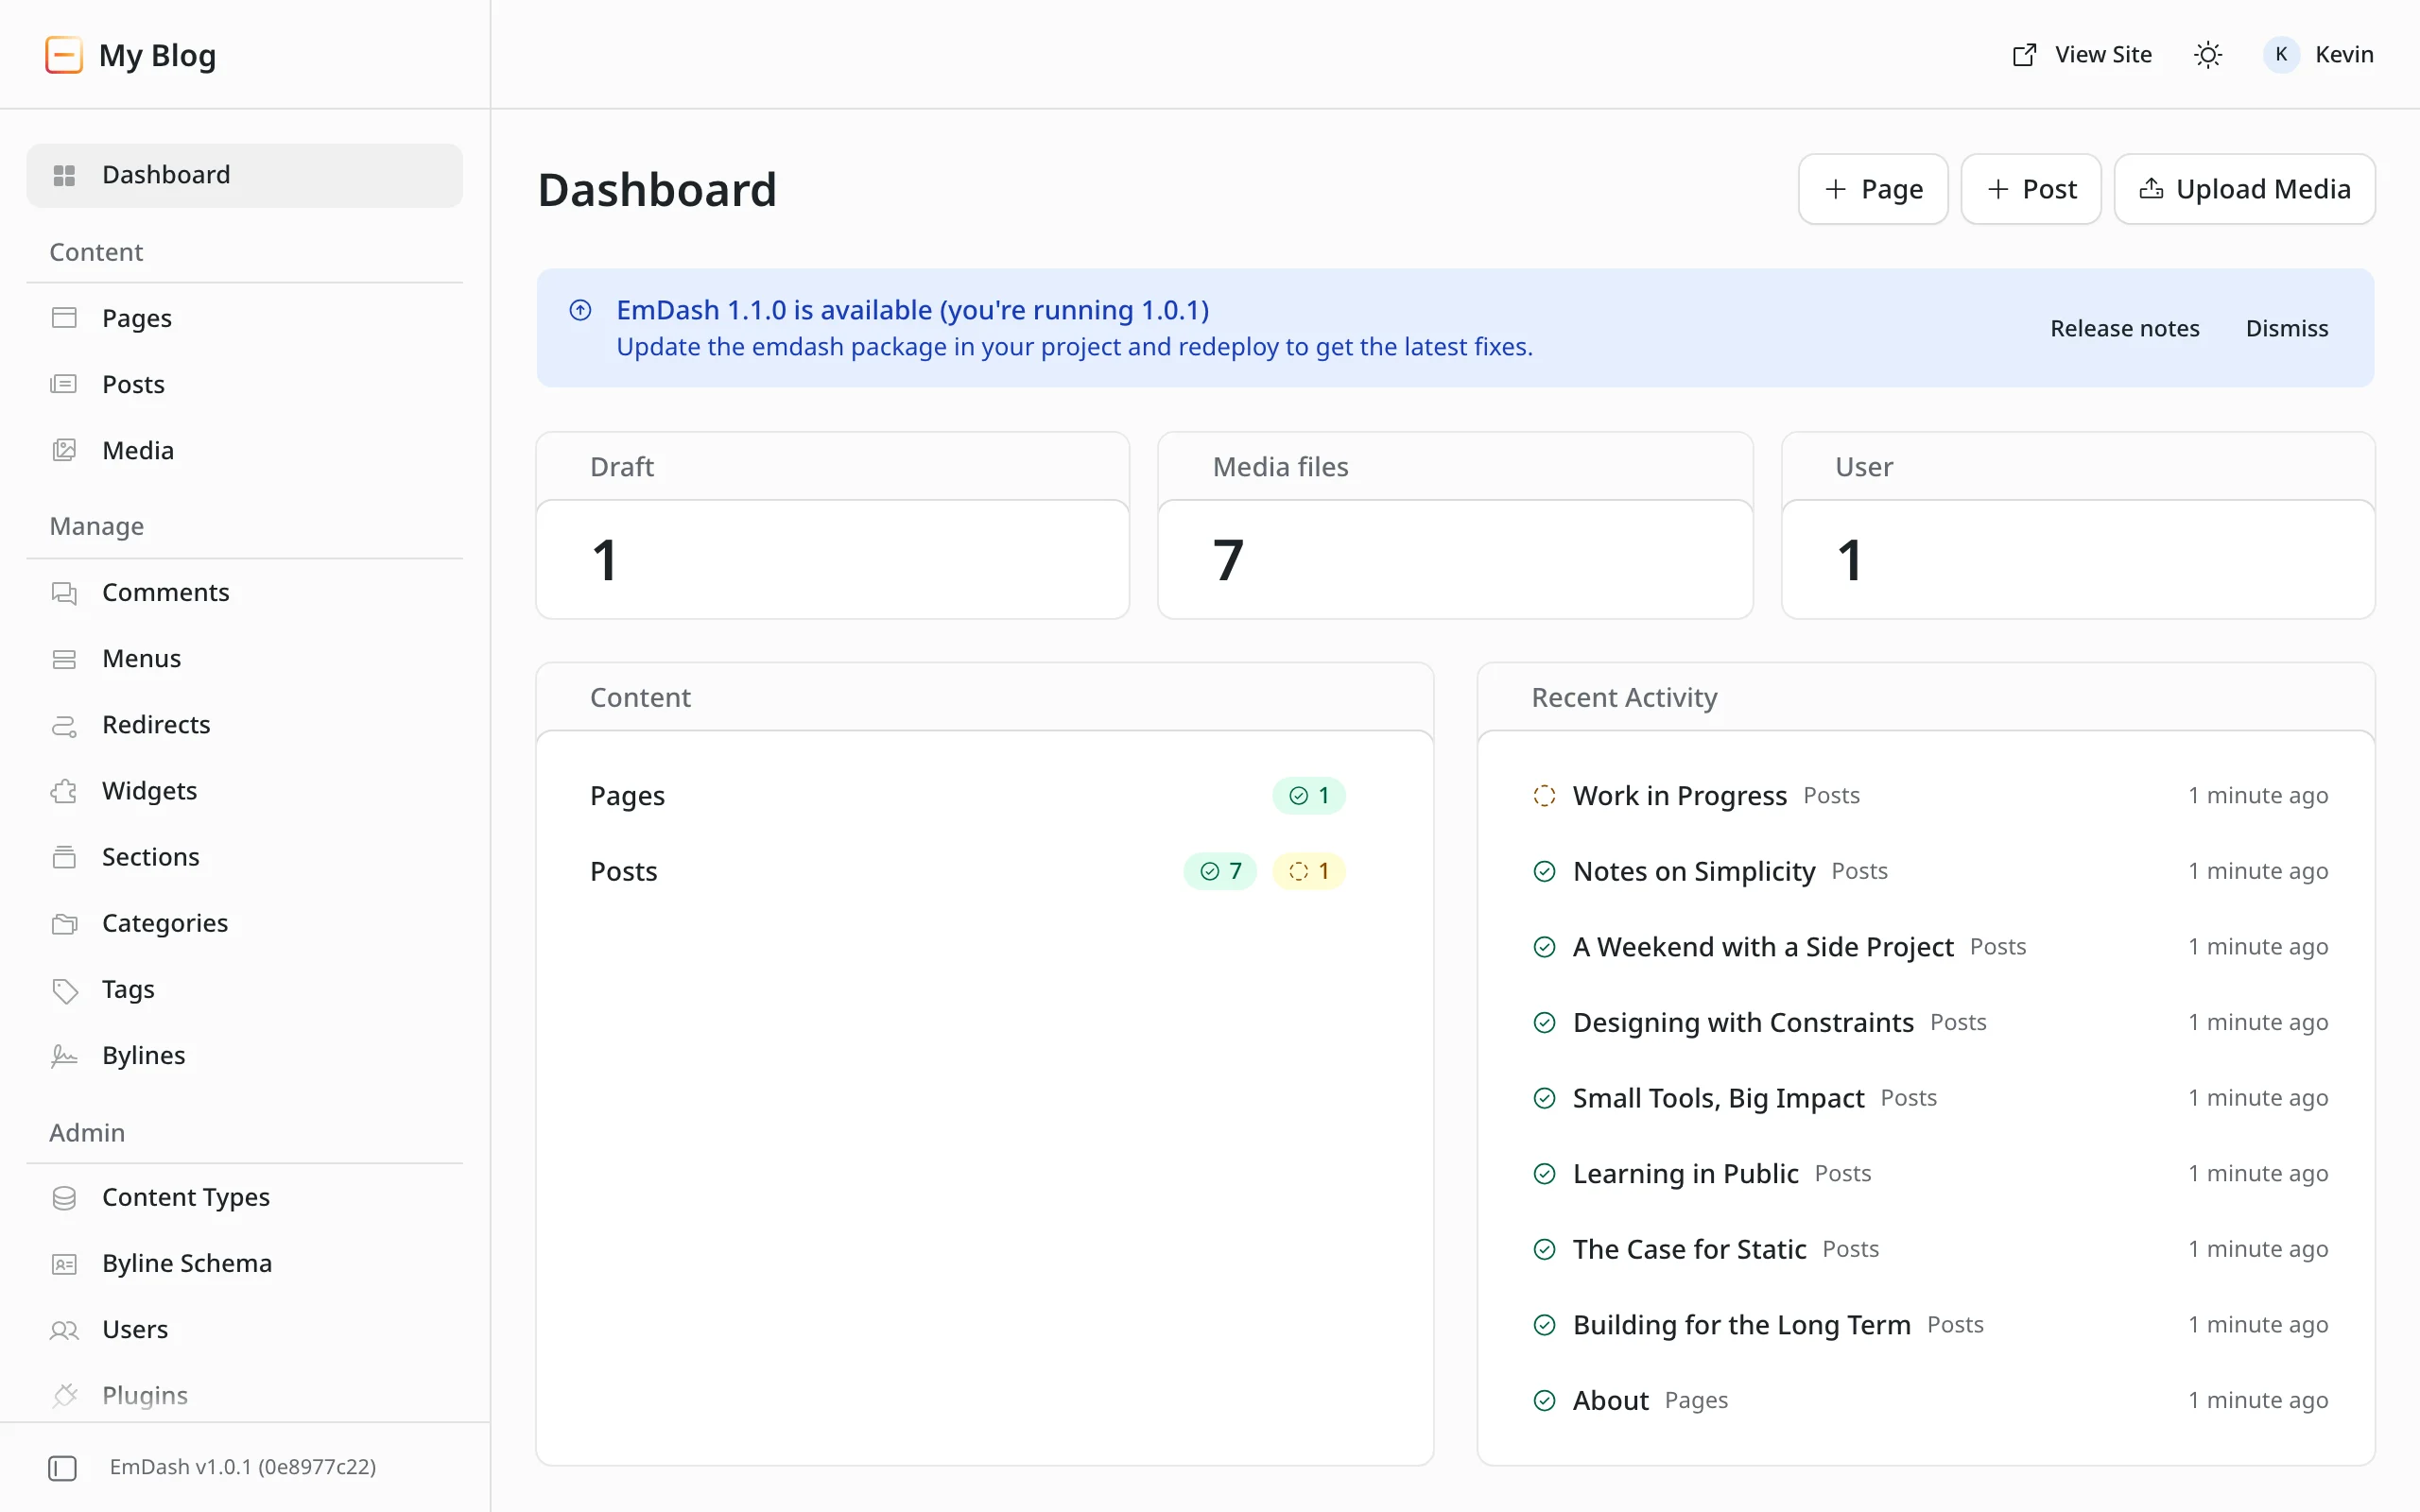
Two things are good to know. The notice only appears once a version has been public for at least 24 hours, and EmDash checks npm at most once a day. So on release day itself you may not see it yet. And the "Release notes" button leads to EmDash's releases on GitHub. Read what changed in the new version before you update, because that's where you'll find anything you need to adjust. On this site we also sum up every version in the Changelog section.
Before you start
Settle three things before you touch anything:
- How does your site get online? If you uploaded it from your machine with
npm run deploy, you do the same for the update. If your project is connected to Git, for example through Workers Builds on Cloudflare, a push puts the new version live. Everything here still applies; you just commit and push at the end instead of runningdeploy. - Is your project in Git? Then going back is a single command for the code. If it isn't, now is a good time.
- Where does your data live? Content, users and settings live in the database, which on Cloudflare is D1. The update changes the code, and on the first request EmDash adapts the database. More on that below.
Step 1: Note a restore point
D1 backs up your database continuously on its own. Cloudflare calls it Time Travel: you can restore a database to any minute in the last 30 days, or the last 7 days on the free Workers plan (Time Travel docs). There's nothing to switch on.
It's still handy to note the state right before the update. One command prints the current restore point, called a bookmark. You'll find your database's name in wrangler.jsonc under database_name:
npx wrangler d1 time-travel info YOUR-DATABASE
Copy the line with time-travel restore into your notes. It gets you back to exactly this state if you ever need it.
For the other ways to back up EmDash and what each one covers, see backing up EmDash.
Step 2: Bump the packages
EmDash is made of several packages. A site from the Cloudflare template has two: emdash itself and @emdash-cms/cloudflare. Always bump them together:
npm install emdash@latest @emdash-cms/cloudflare@latestWith pnpm the command is pnpm add, the rest is the same. If you use other packages whose names start with @emdash-cms/, such as plugins, add them to the same command.
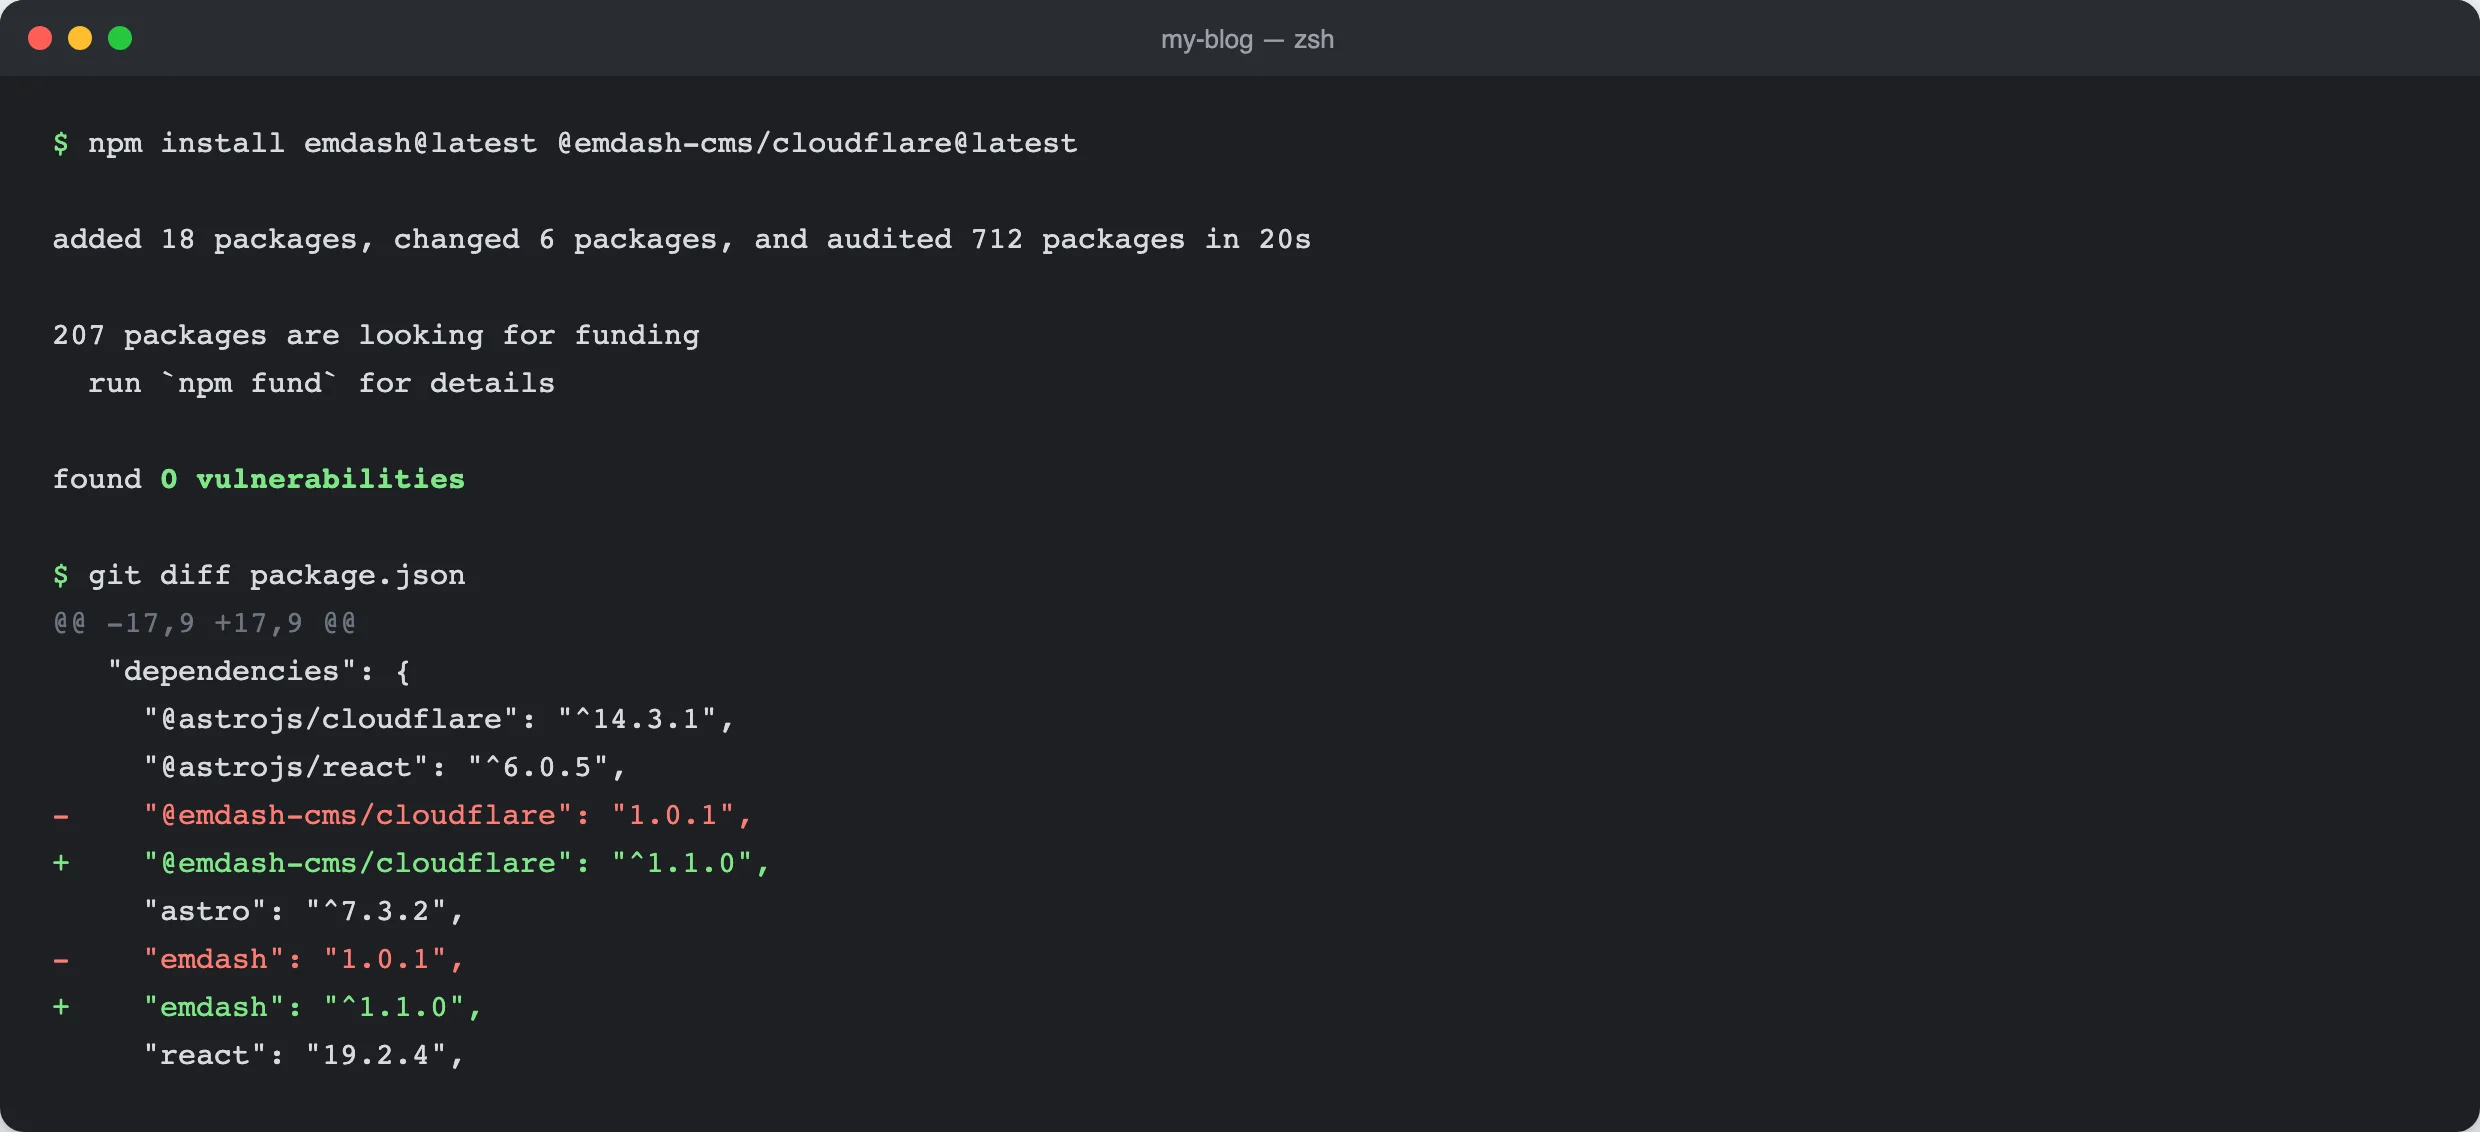
For me this took 20 seconds. Exactly two lines changed in package.json, plus package-lock.json, where npm records the exact versions.
Why both packages? In an earlier test I deliberately bumped only emdash and left @emdash-cms/cloudflare on the old version. The site built without errors, and nothing warned about the mismatch. That's exactly why you shouldn't count on a tool to point out the half you forgot.
A side note: the template writes the version into package.json with a caret, like ^1.0.1. That means "1.0.1 or newer, but still 1.x". A freshly created project therefore gets the newest 1.x right away. For me, even create-emdash@1.0.1 landed directly on EmDash 1.1.0.
New: all of it in one command. Since October there's npx upgrade-emdash@latest (#3804). The command finds every EmDash package in the project by itself and bumps them together, so the forgotten half from above can't happen to you. It also writes to .emdash/UPGRADE.md what changed between your version and the new one and whether a migration comes along. With --dry-run it only shows the plan first; on this site that was two packages going from 1.1.0 to 1.2.0 and 67 changelog entries. It doesn't touch code, the database or the deployment, so steps 3 to 5 stay the same. It needs EmDash 0.35.0 or later.
Step 3: Try it locally
Before the new version goes live, start it once on your machine:
npm run devOpen the site and the admin at http://localhost:4321/_emdash/admin and click through the pages that matter to you. If you have your own templates or plugins, those are where an update is most likely to change something. If the release notes say you need to adjust something, now is the moment.
Step 4: Redeploy
Once everything looks right locally, put the new version online:
npm run deployIf your project is connected to Git, commit package.json and package-lock.json instead and push. The build on Cloudflare does the rest.
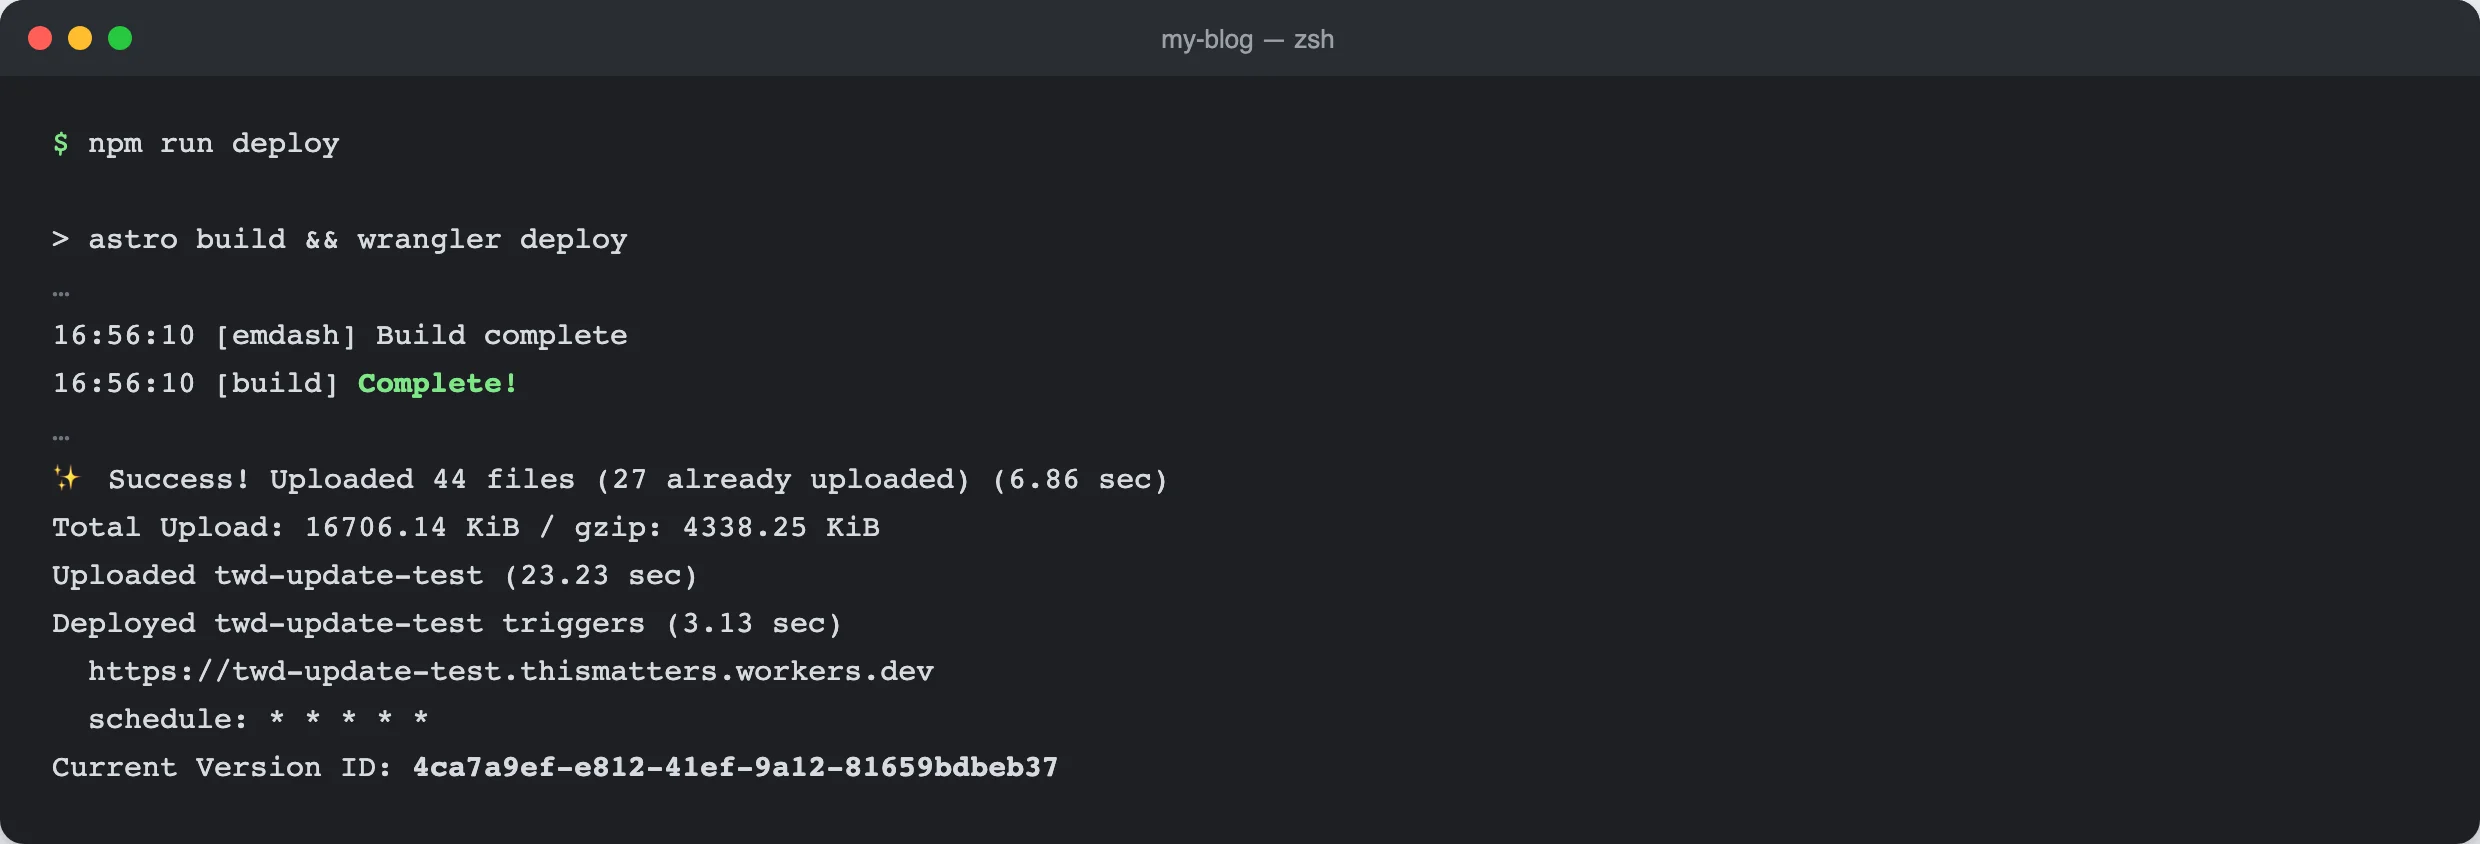
For me the deployment took 37 seconds. At the end Wrangler prints the ID of the new version. You'll need it if you want to go back.
Step 5: The first request and the migrations
Now comes the part you don't see. New EmDash versions sometimes bring changes to the database, for example a new table for a new feature. These changes are called migrations. By default, EmDash runs them itself on the first request to the site after the deployment.
In my test the database had 88 migrations behind it before the update and 90 after. The two new ones belong to redirects. All eight posts from the template were still there afterwards. The only thing you notice is the time: the first request to the home page took 5.4 seconds, the next pages came in 1.2 to 1.6 seconds. The update from 1.1.0 to 1.2.0 brought no new migration: the database stayed at 90, and all eight posts were there again.
So after the deployment, open the home page yourself before your visitors do. Then check the admin.
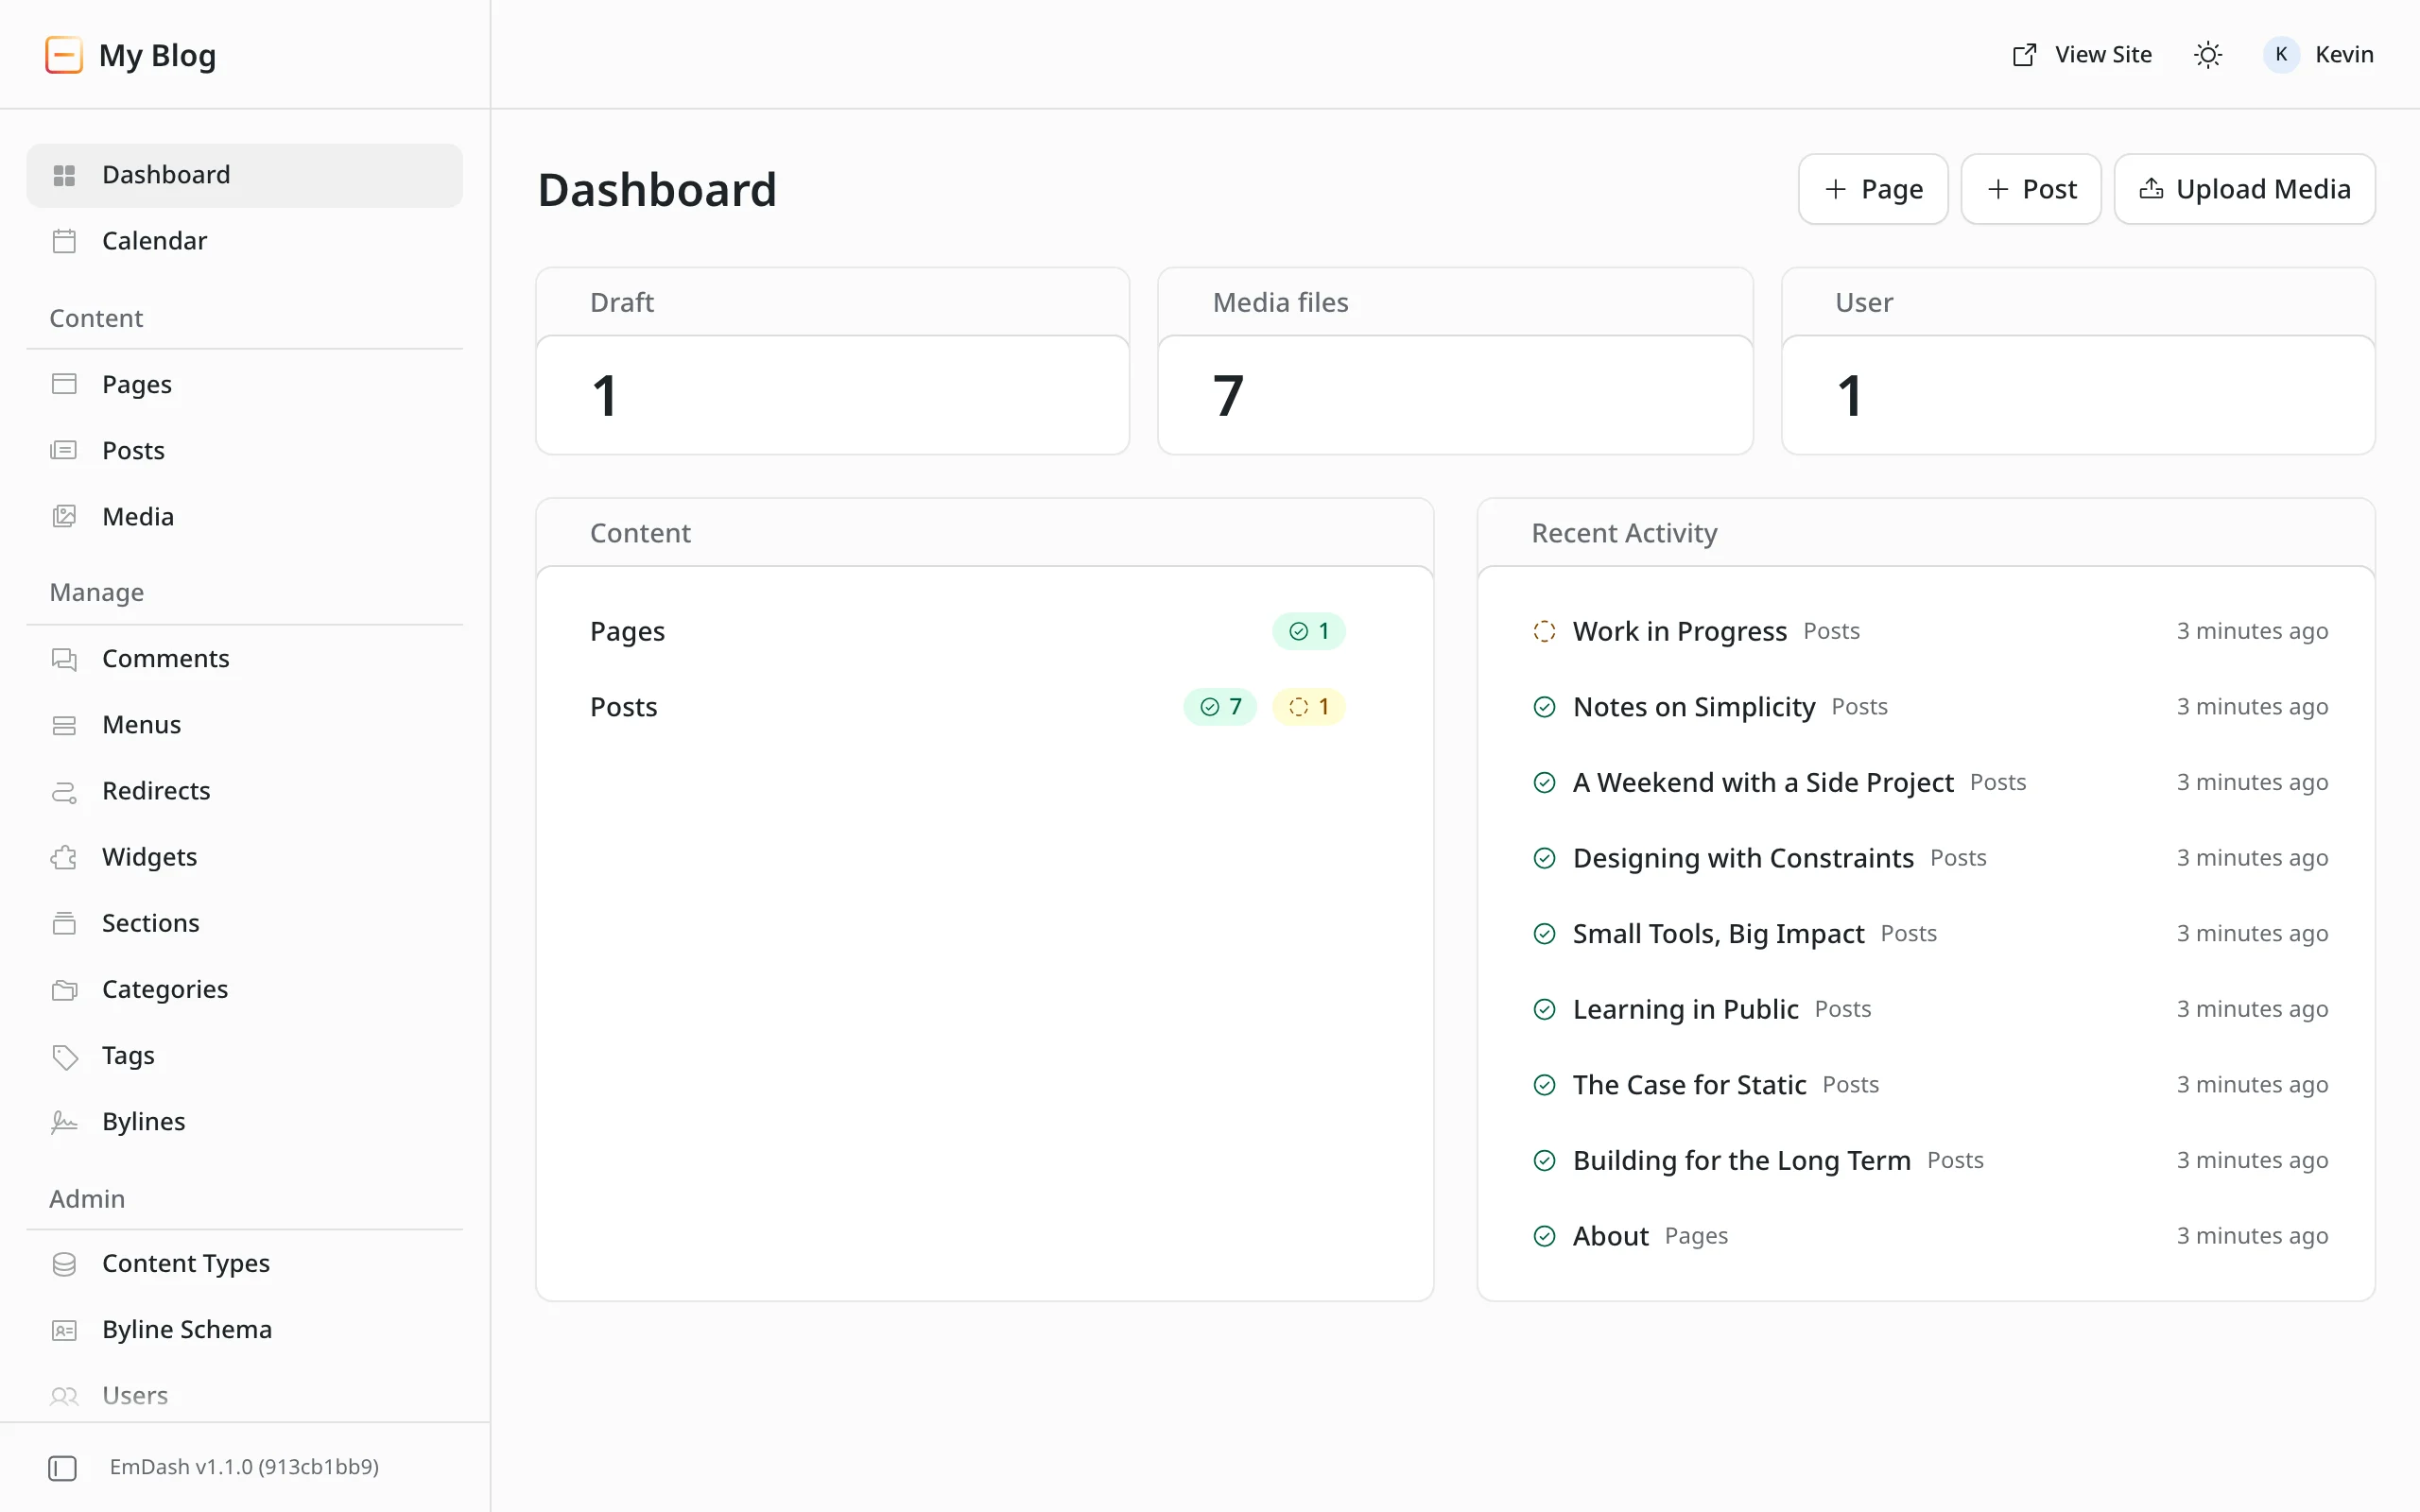
The notice is gone, the bottom left shows the new version, and in my case "Calendar" had appeared as a new entry in the navigation.
For teams who'd rather control database changes themselves, there's the migrations option in astro.config.mjs. With runtime: "check", EmDash doesn't run migrations itself but answers with a 503 error until they're done. With runtime: "manual" it doesn't check at all. You then run them with npx emdash migrate, for example as a step in your deployment (configuration docs). For a single site, the default auto is the simplest choice.
If something goes wrong: back to the old version
For the code, going back is quick. Cloudflare keeps every version of your Worker, and one command puts an earlier one live again. npx wrangler deployments list shows you the versions, then:
npx wrangler rollback VERSION-ID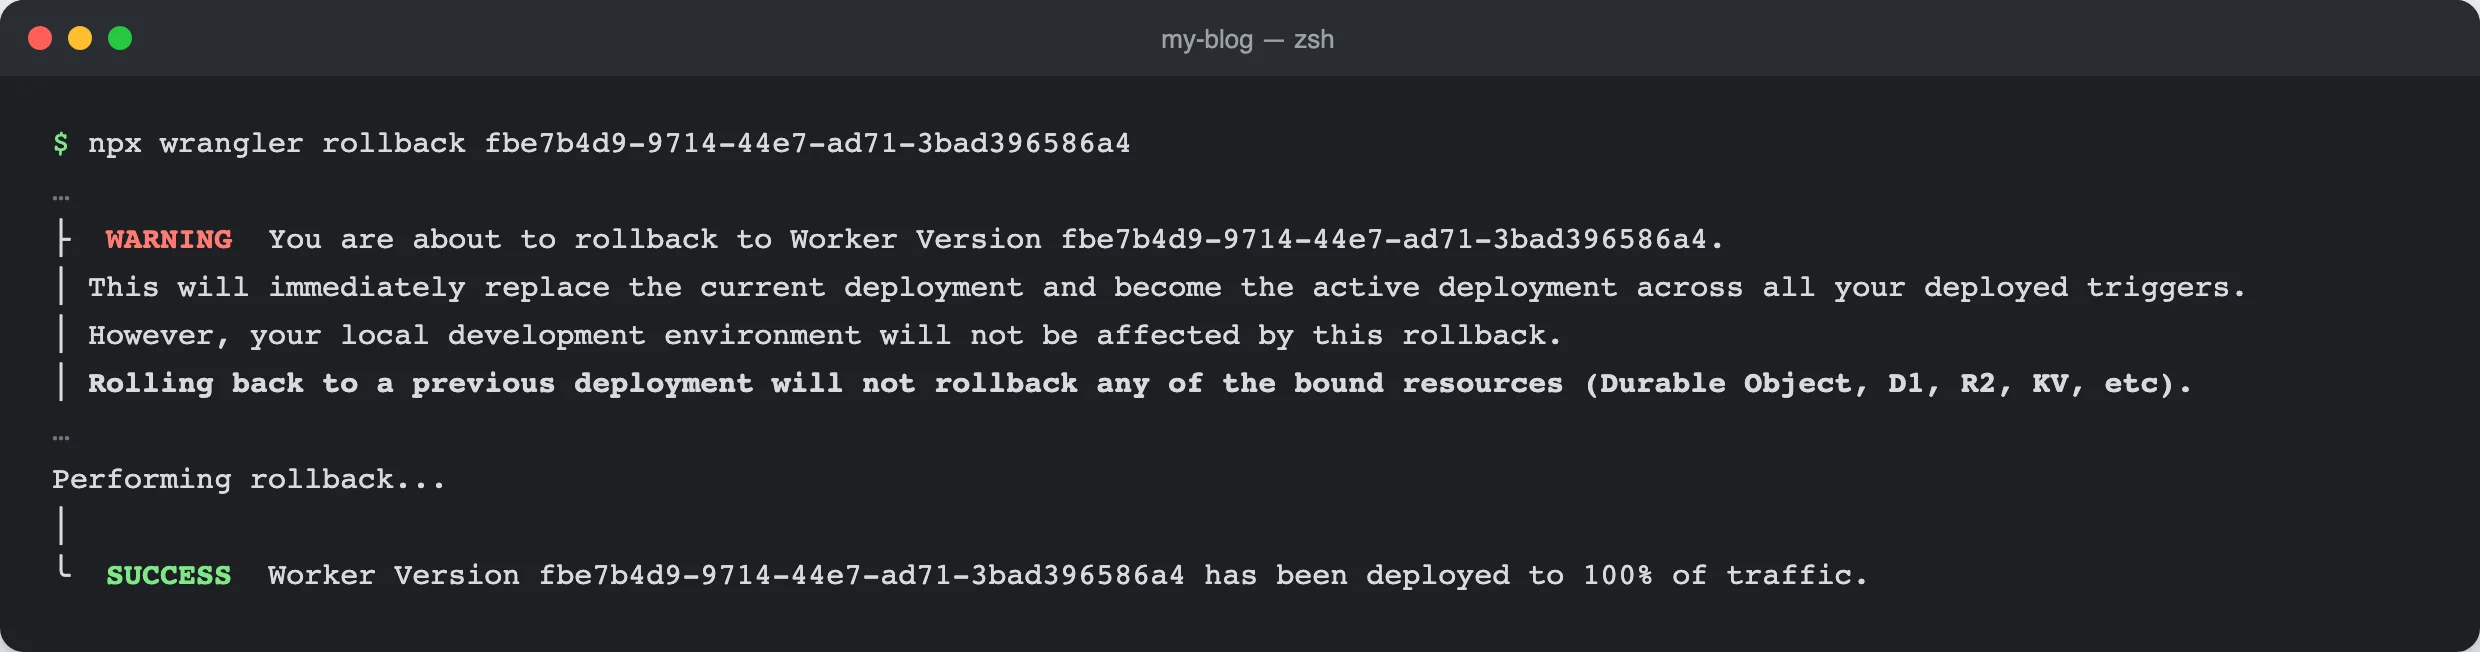
For me this took a few seconds. But read the warning carefully: only the code goes back. The database stays as it is, with the new version's migrations.
In my test EmDash 1.0.1 kept running fine on the already migrated database. The home page and posts answered normally. That worked because the two new migrations only added things the old version simply ignores. It isn't guaranteed. EmDash has no command that undoes migrations.
If the database has to go back too, the restore point from step 1 comes in:
npx wrangler d1 time-travel restore YOUR-DATABASE --bookmark=YOUR-BOOKMARKThat's the last resort, not the first. A restore overwrites the whole database. Anything added since the restore point is gone afterwards, including a comment or a post that was published in the meantime. At least Wrangler prints a new bookmark you can use to undo the restore.
My order in an emergency: roll back the code first and check whether the site runs with it. Only if it doesn't, restore the database.
In short
- Read the release notes.
- Note a restore point:
npx wrangler d1 time-travel info YOUR-DATABASE. - Bump the packages together:
npx upgrade-emdash@latest, or by handnpm install emdash@latest @emdash-cms/cloudflare@latest. - Check locally:
npm run dev. - Deploy:
npm run deploy, or commit and push. - Open the home page once yourself and check the version in the admin.
What changed in a given version we sum up for each release in the Changelog section, most recently for EmDash 1.2.
What about you?
How do you update your EmDash sites: by hand, through Git or with a script of your own? And has anything ever gone wrong? Tell me in the comments. I'll add what you report to the article.
Changes to this article
- : Update rechecked locally: the same steps, no new migration.
- : Added the new upgrade-emdash command.

Comments
No comments yet
First-time comments appear once we've approved them. How we handle your details