At the end of Kevin's getting-started article your blog is running. Top left it says "My Blog", the links are blue, the font is Inter, and that's how every fresh site on the blog template looks. How do you turn it into your blog, and how much of that works without touching code?
More than you might expect. Title, tagline, logo and favicon are set in the admin. For colours and fonts you change a few lines in three files. I went through it all with EmDash 1.1.0 on a fresh copy of the blog template, and you'll see a before and after at the end. The files are identical in the Node and Cloudflare versions of the template, so it doesn't matter which one you picked.
What works without code
Start in the admin under Settings and open General. At the top is the Site Identity section with site title, tagline, site URL, logo and favicon.
You already typed a title and tagline into the setup wizard. Kevin noticed that in 1.1.0 neither of them sticks, and I could reproduce it: I entered my own title in the wizard and the site still said "My Blog". The bug has since been fixed, and the fix ships with the next release after 1.1.0. Until then, enter both again here. The title shows up in the browser tab and the header, the tagline in the footer.
For the logo, click Select Logo. The media library opens, and Upload files adds your file. Once it's uploaded the image is already selected, so you just confirm with Select. The favicon works the same way. Finally, click Save at the top right.
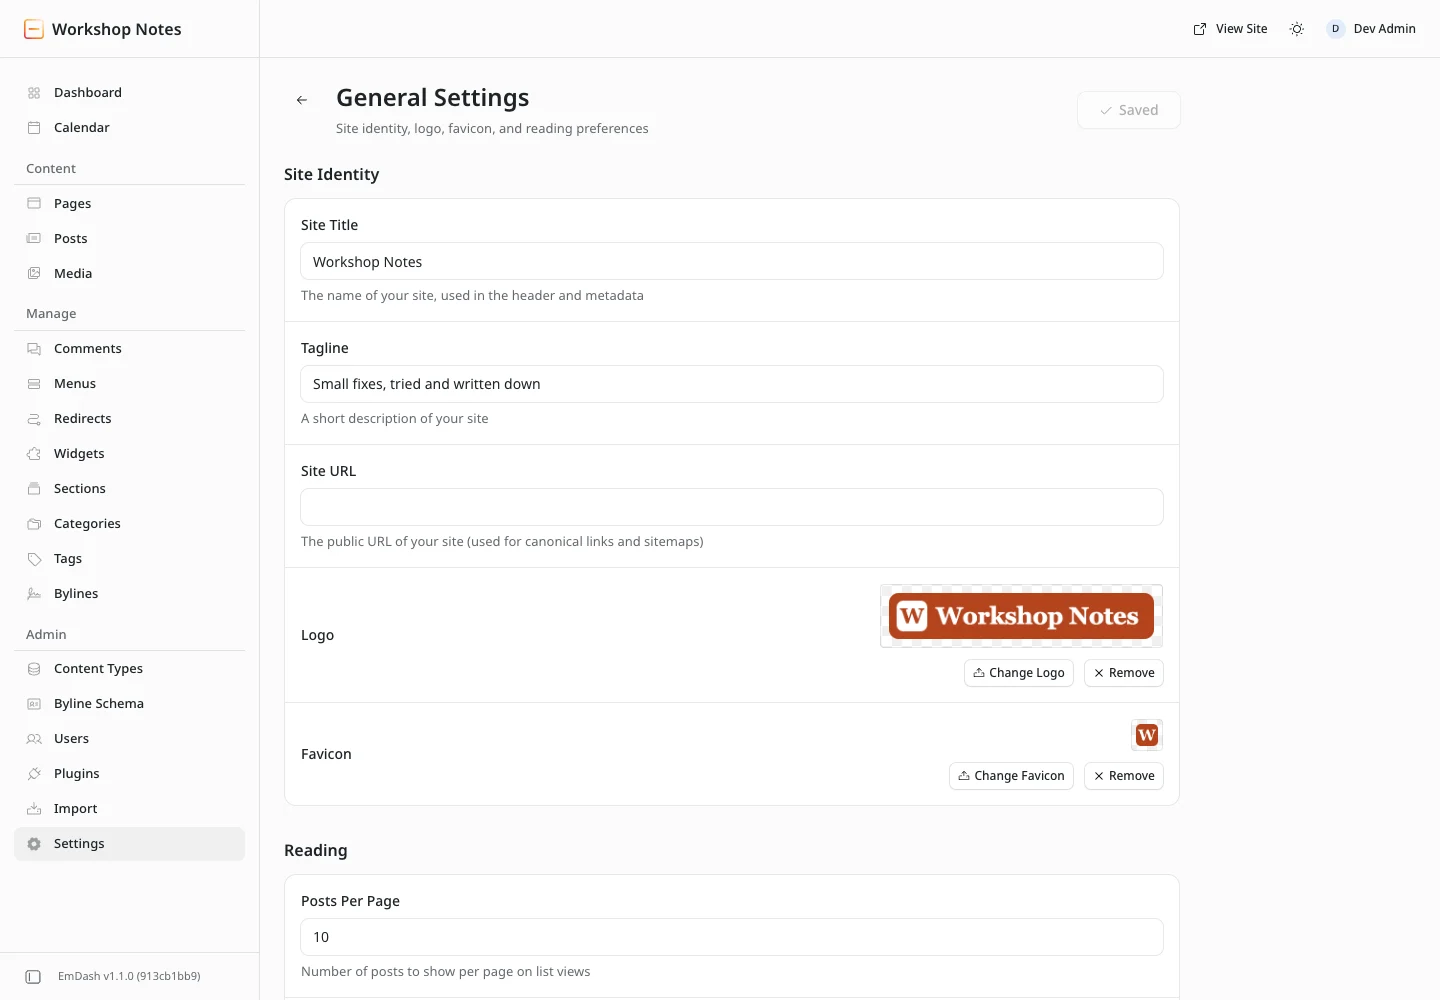
Reload the site and it's all there, no deployment needed. EmDash keeps these settings in the database, and the template reads them on every request. In the header the logo replaces the title text at 48 pixels high; in the footer it's 24. For the alt text the template uses the alt text from the media library, or the site title if there isn't one. EmDash adds the favicon to every page's <head> itself, and the admin's browser tab picks it up too.
Three things to watch with the images themselves:
- There's only one logo. The settings have no separate dark-mode version, so a transparent PNG with dark lettering disappears on a dark background. I went for a logo with its own coloured background that works on both.
- No SVG. In 1.1.0 the media library accepts PNG, JPEG, WebP, GIF, AVIF and JPEG XL. It rejects an SVG file, and the dialog only says "Upload failed" without a reason. An
.icofile isn't on the list either. - Make the favicon a square PNG. Mine is 256 × 256 pixels. EmDash only generates a
<link rel="icon">from it; there's no separate home-screen icon for iPhones in 1.1.0 yet.
With a title, logo and favicon your site is recognisably yours. It's still blue and white, though, and no switch in the admin changes that. From here on it's code.
Colours: read tokens.css, write theme.css
Kevin said it in the getting-started article: the theme is code in your project. Two files in src/styles/ handle the colours.
tokens.css holds every design value of the template with its default, from colours and type sizes to spacing, column widths and shadows. Each value is a CSS custom property, a so-called design token, such as --color-brand for the accent colour. You read this file, but you don't edit it. Your changes go into theme.css, which ships nearly empty apart from a long comment.
This works without any tricks thanks to CSS cascade layers. tokens.css puts all its values into @layer base, theme.css declares them outside any layer, and unlayered declarations always beat layered ones. So you don't need to think about order or specificity. Both files are imported by src/layouts/Base.astro, the skeleton of every page with the <head>, header and footer.
The colours in tokens.css use light-dark(). The first value applies in light mode, the second in dark mode. Which mode is active is decided by the switcher at the bottom right of the footer, with light, dark and system. With no choice made, the site follows the operating system.
Here's my theme.css after the makeover:
:root {
	--color-brand: light-dark(#b4441c, #f0875a);
	--color-brand-hover: light-dark(#8f3514, #f6a47f);
	--color-on-brand: light-dark(#ffffff, #1c1410);
	--color-bg: light-dark(#fffdf8, #16120f);
	--font-heading: var(--font-fraunces);
}
The last line belongs to the fonts section below. --color-brand colours links, the search field's focus outline, text selection and the button under the comment form. --color-brand-hover is the colour on mouse-over. --color-on-brand is text on surfaces in the accent colour. The template uses white, which would be hard to read on my light orange in dark mode, so I use an almost black brown there. --color-bg is the page background, a warm white instead of pure white in my case. You don't need to touch the focus ring around the search field; tokens.css mixes it from --color-brand with color-mix().
If you write a single colour instead of light-dark(), it applies to both modes. To see what other tokens there are, such as --color-text, --color-border or --radius, look in tokens.css.
Safari before 17.5, Chrome before 123 and Firefox before 120 don't know light-dark(). For them tokens.css has an @supports not block with the default light colours. Your declarations in theme.css override that block, though, and a browser like that can't do anything with light-dark(), so it simply drops your colours. Links then show in the text colour, the background turns white and the button under the comment form loses its fill. The site stays readable, just without your accent colour. If those browsers matter to you, repeat your light colours as plain values in theme.css, below the :root block:
@supports not (color: light-dark(#000, #fff)) {
	:root {
		--color-brand: #b4441c;
		--color-brand-hover: #8f3514;
		--color-on-brand: #ffffff;
		--color-bg: #fffdf8;
	}
}
Fonts: astro.config.mjs, Base.astro and theme.css
The template loads its web fonts through Astro's Fonts API, which lives in astro.config.mjs in the project root. There's a fonts: section with two entries: Inter for body text as --font-body, and JetBrains Mono for code as --font-mono. Both come from the Google Fonts catalogue via fontProviders.google().
To change the body font, you only change the name. I turned "Inter" into "Source Sans 3". If npm run dev is running, Astro restarts the dev server on its own. Just make sure the font actually offers the weights listed in weights.
Headings have their own token, --font-heading, which points to --font-body in tokens.css. The simplest option is a system font that's already on your readers' machines, like the example in the theme.css comment:
--font-heading: "Iowan Old Style", Georgia, serif;For a web font you touch three places. I picked Fraunces for the headings. First, add an entry to astro.config.mjs:
fonts: [
	{
		provider: fontProviders.google(),
		name: "Source Sans 3",
		cssVariable: "--font-body",
		weights: [400, 500, 600, 700],
		fallbacks: ["sans-serif"],
	},
	{
		provider: fontProviders.google(),
		name: "Fraunces",
		cssVariable: "--font-fraunces",
		weights: [600, 700],
		fallbacks: ["serif"],
	},
	// JetBrains Mono stays as it is
],
Weights 600 and 700 match the template, which sets subheadings in 600 and the big page title in 700. Second, in src/layouts/Base.astro, add a third <Font> line in the <head> next to the two that are already there:
<Font cssVariable="--font-body" preload />
<Font cssVariable="--font-mono" />
<Font cssVariable="--font-fraunces" />
Only this line puts the --font-fraunces variable into the page. I forgot it the first time. There was no error message; the headings simply stayed in the body font. Third, point --font-heading at the new font in theme.css with --font-heading: var(--font-fraunces);, as in my example above. That applies to every heading from h1 to h6, including the small sidebar titles such as "Categories" and "Recent Posts".
What about Google and privacy?
fontProviders.google() sounds as if every visitor's browser fetches the fonts from Google. Fonts loaded from Google's servers send every visitor's IP address to Google, and serving them from your own domain avoids that.
The Fonts API works differently. Astro downloads the font files once during development and the build, then serves them from your own domain under /_astro/fonts/. I checked the build: Astro reports "Copying fonts (22 files)", the pages only reference files under /_astro/fonts/, and neither fonts.googleapis.com nor fonts.gstatic.com appears anywhere in the output. The only machine talking to Google is the one you build on, not your readers' browsers. Umlauts, ß and the euro sign are already covered by the "latin" subset Astro loads by default, in case you write in German.
Check locally, then deploy
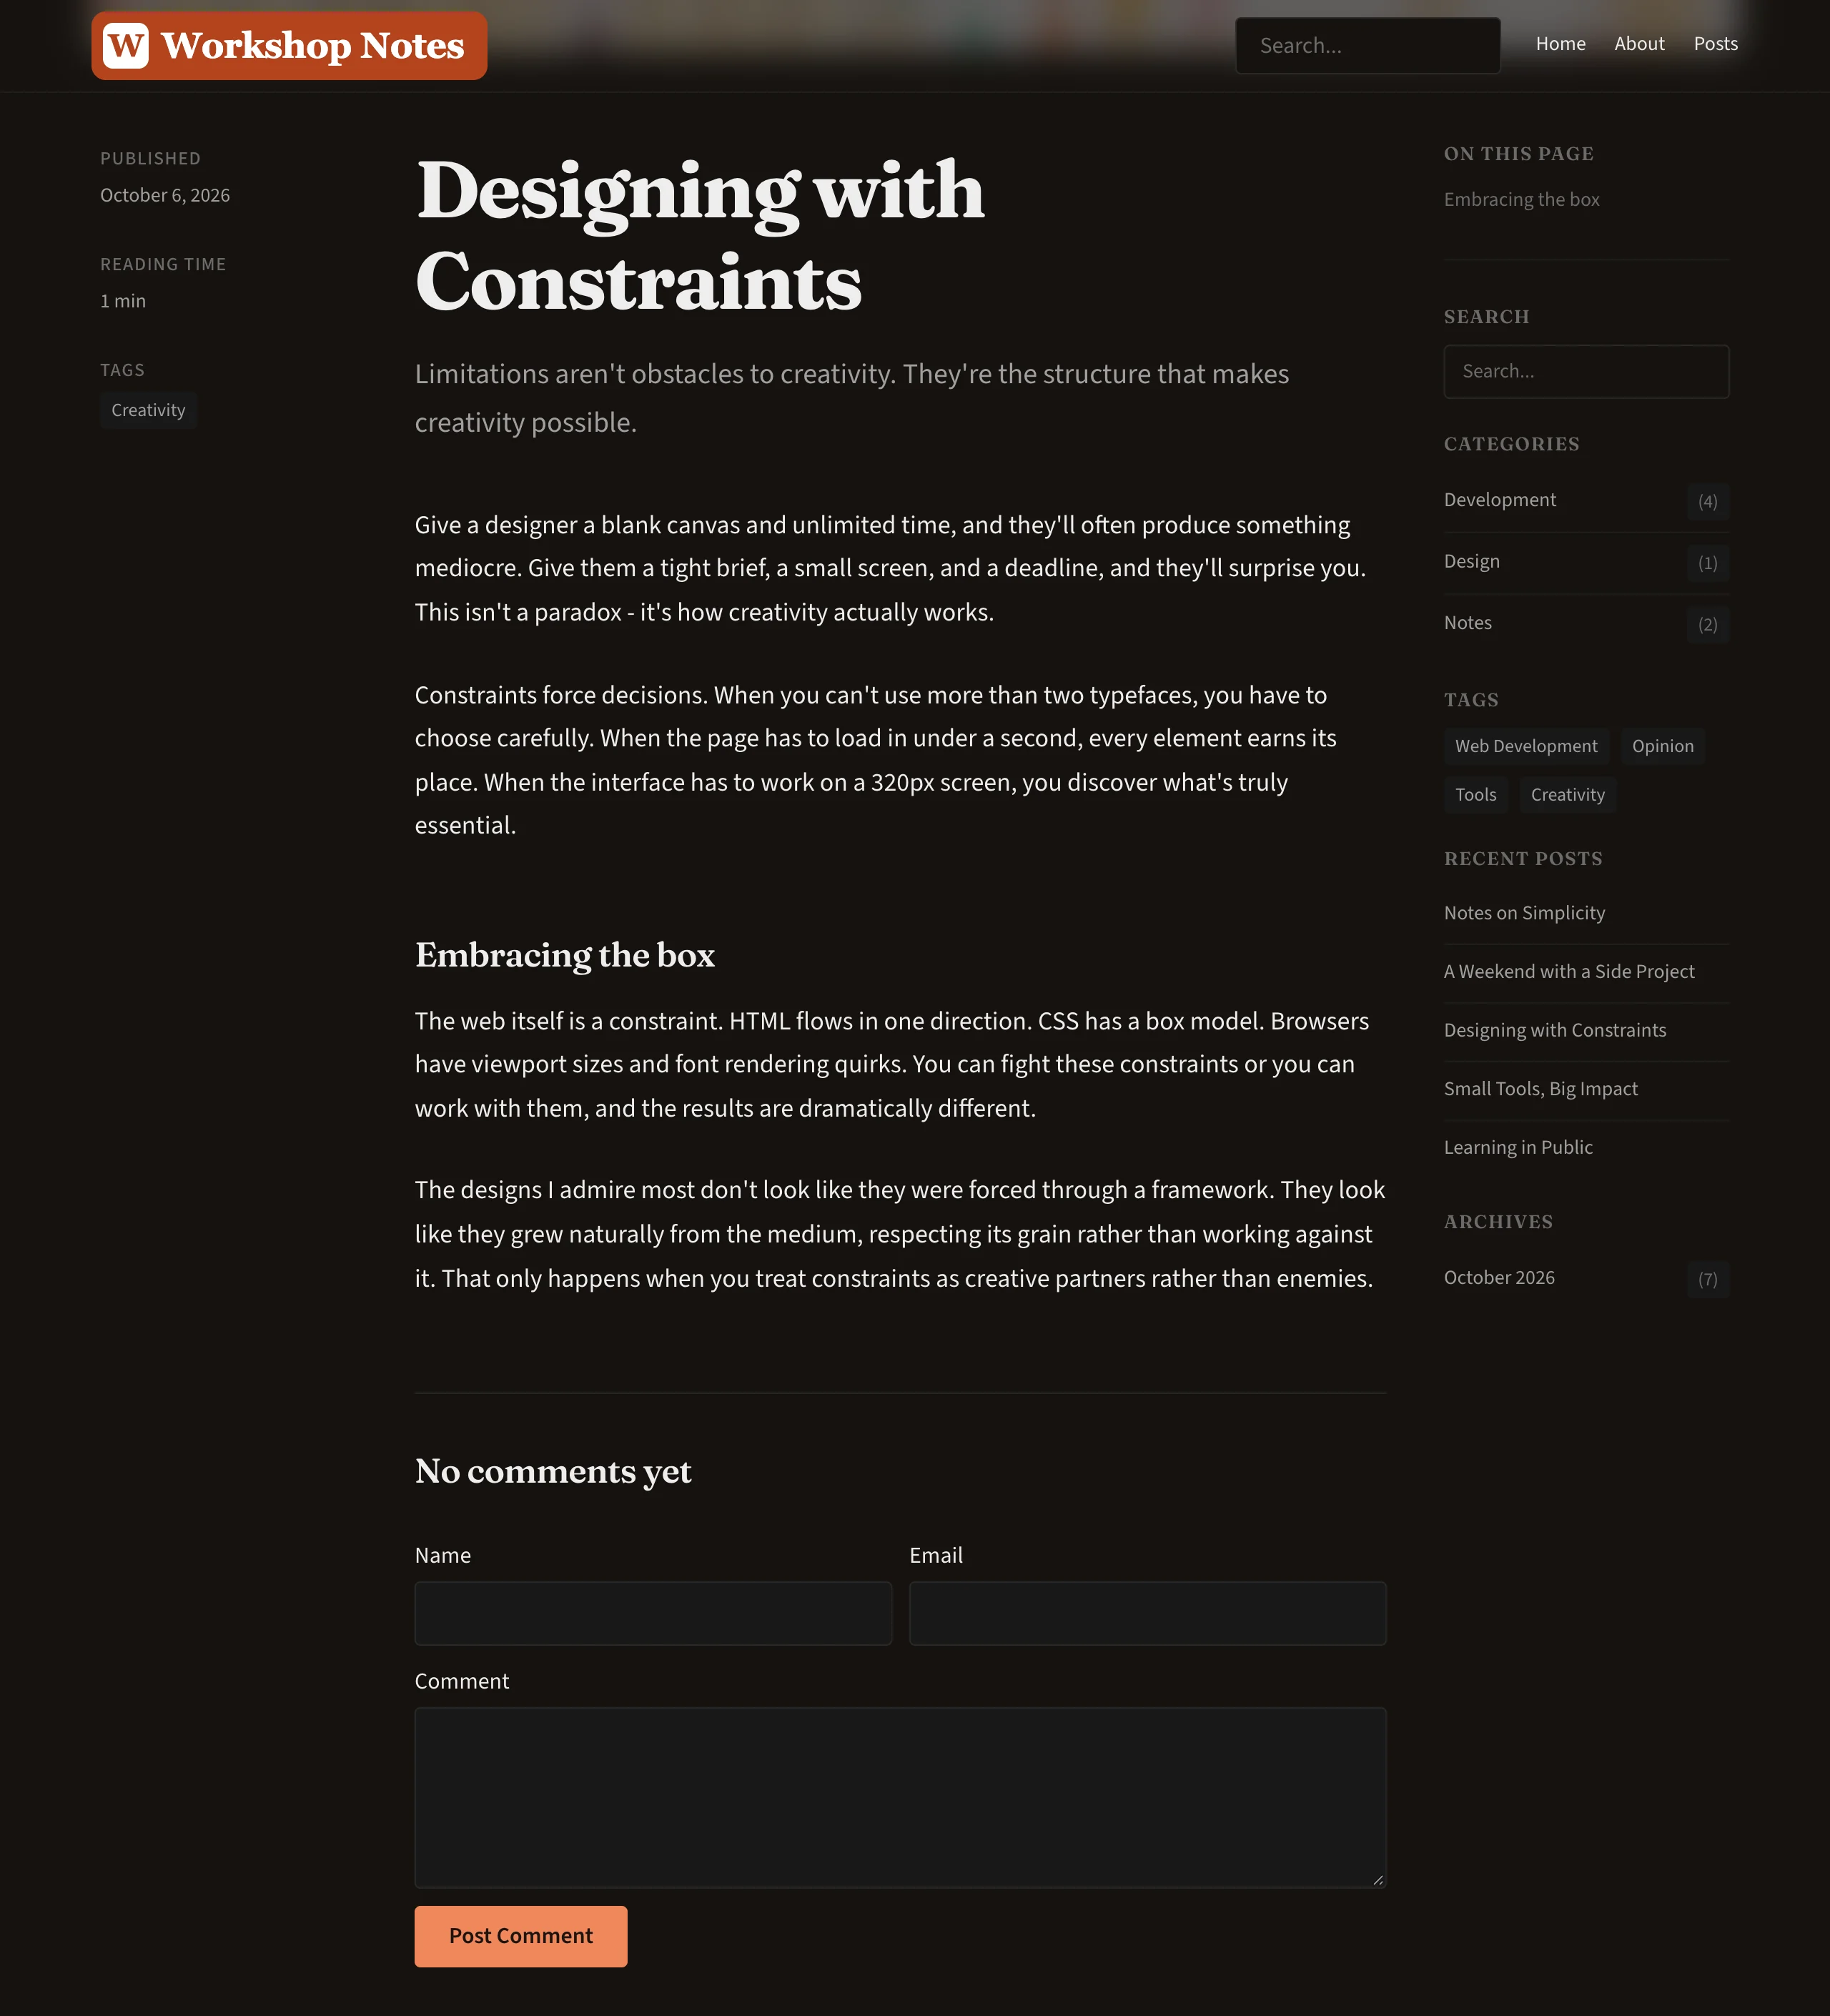
You can check everything locally with npm run dev at http://localhost:4321. Flip the footer switcher between light and dark while you're at it, because a colour that looks good on white can get lost on black.
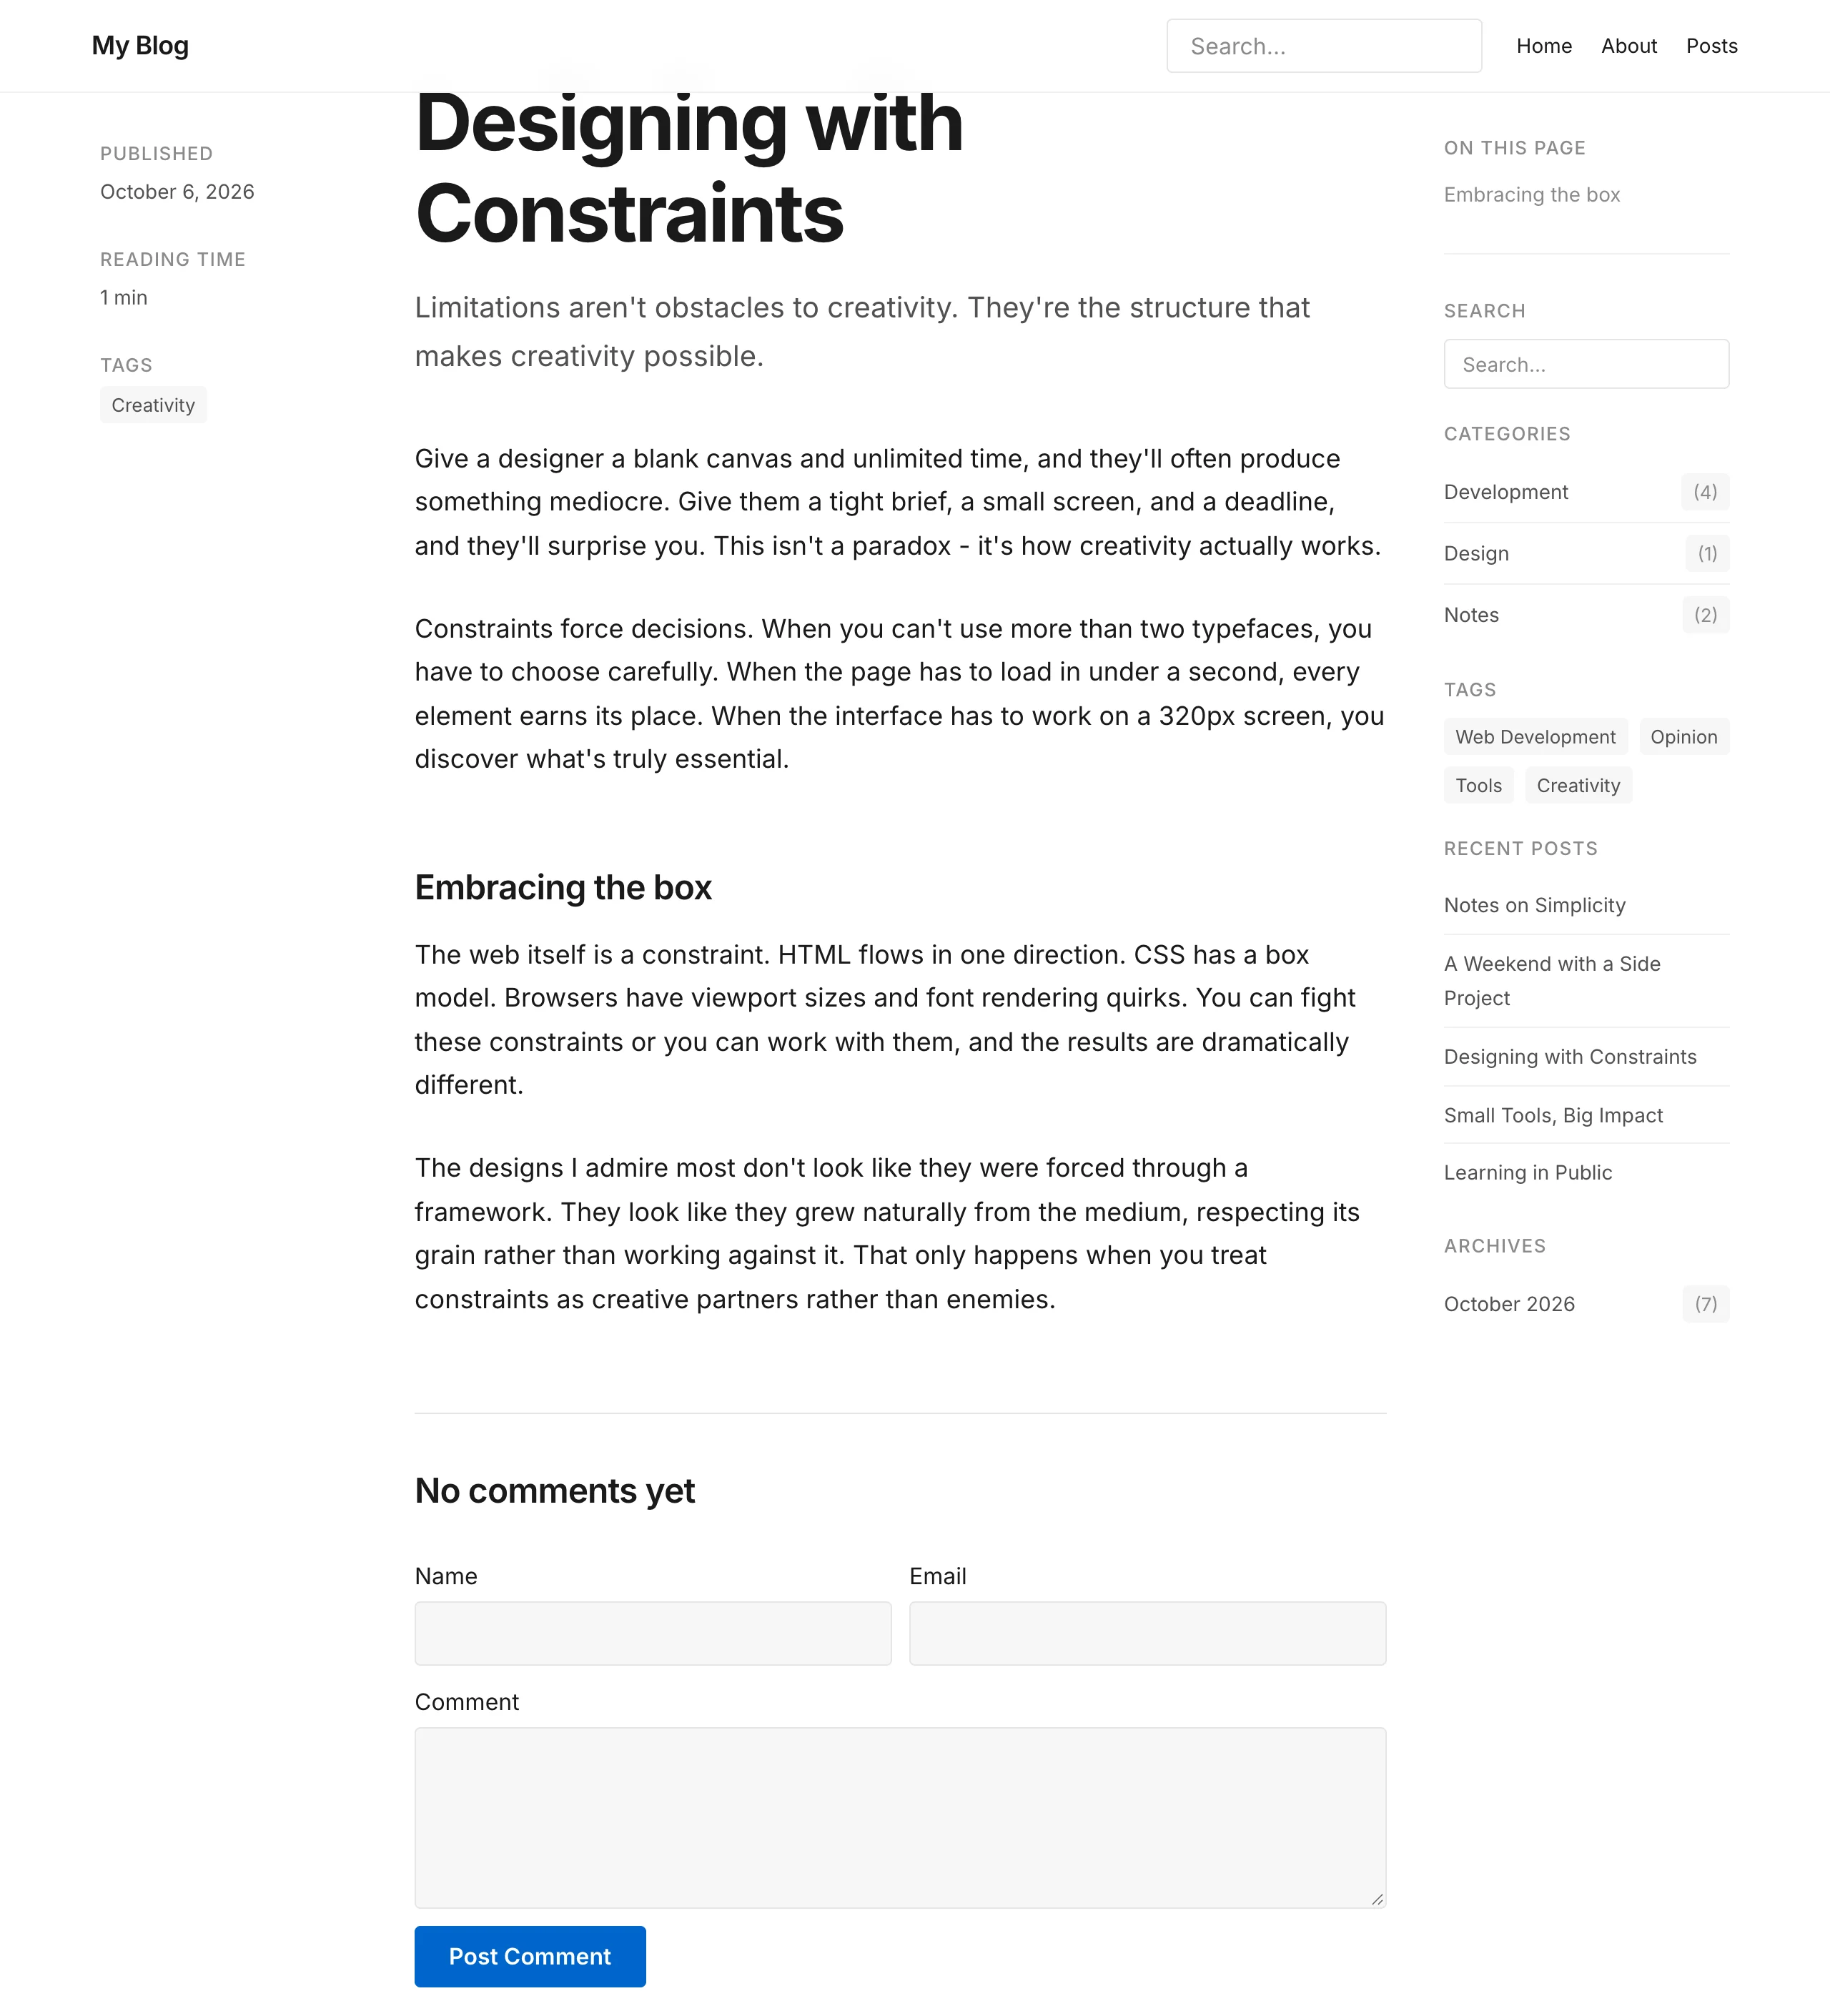
Here's my test page before, with the template's default look:
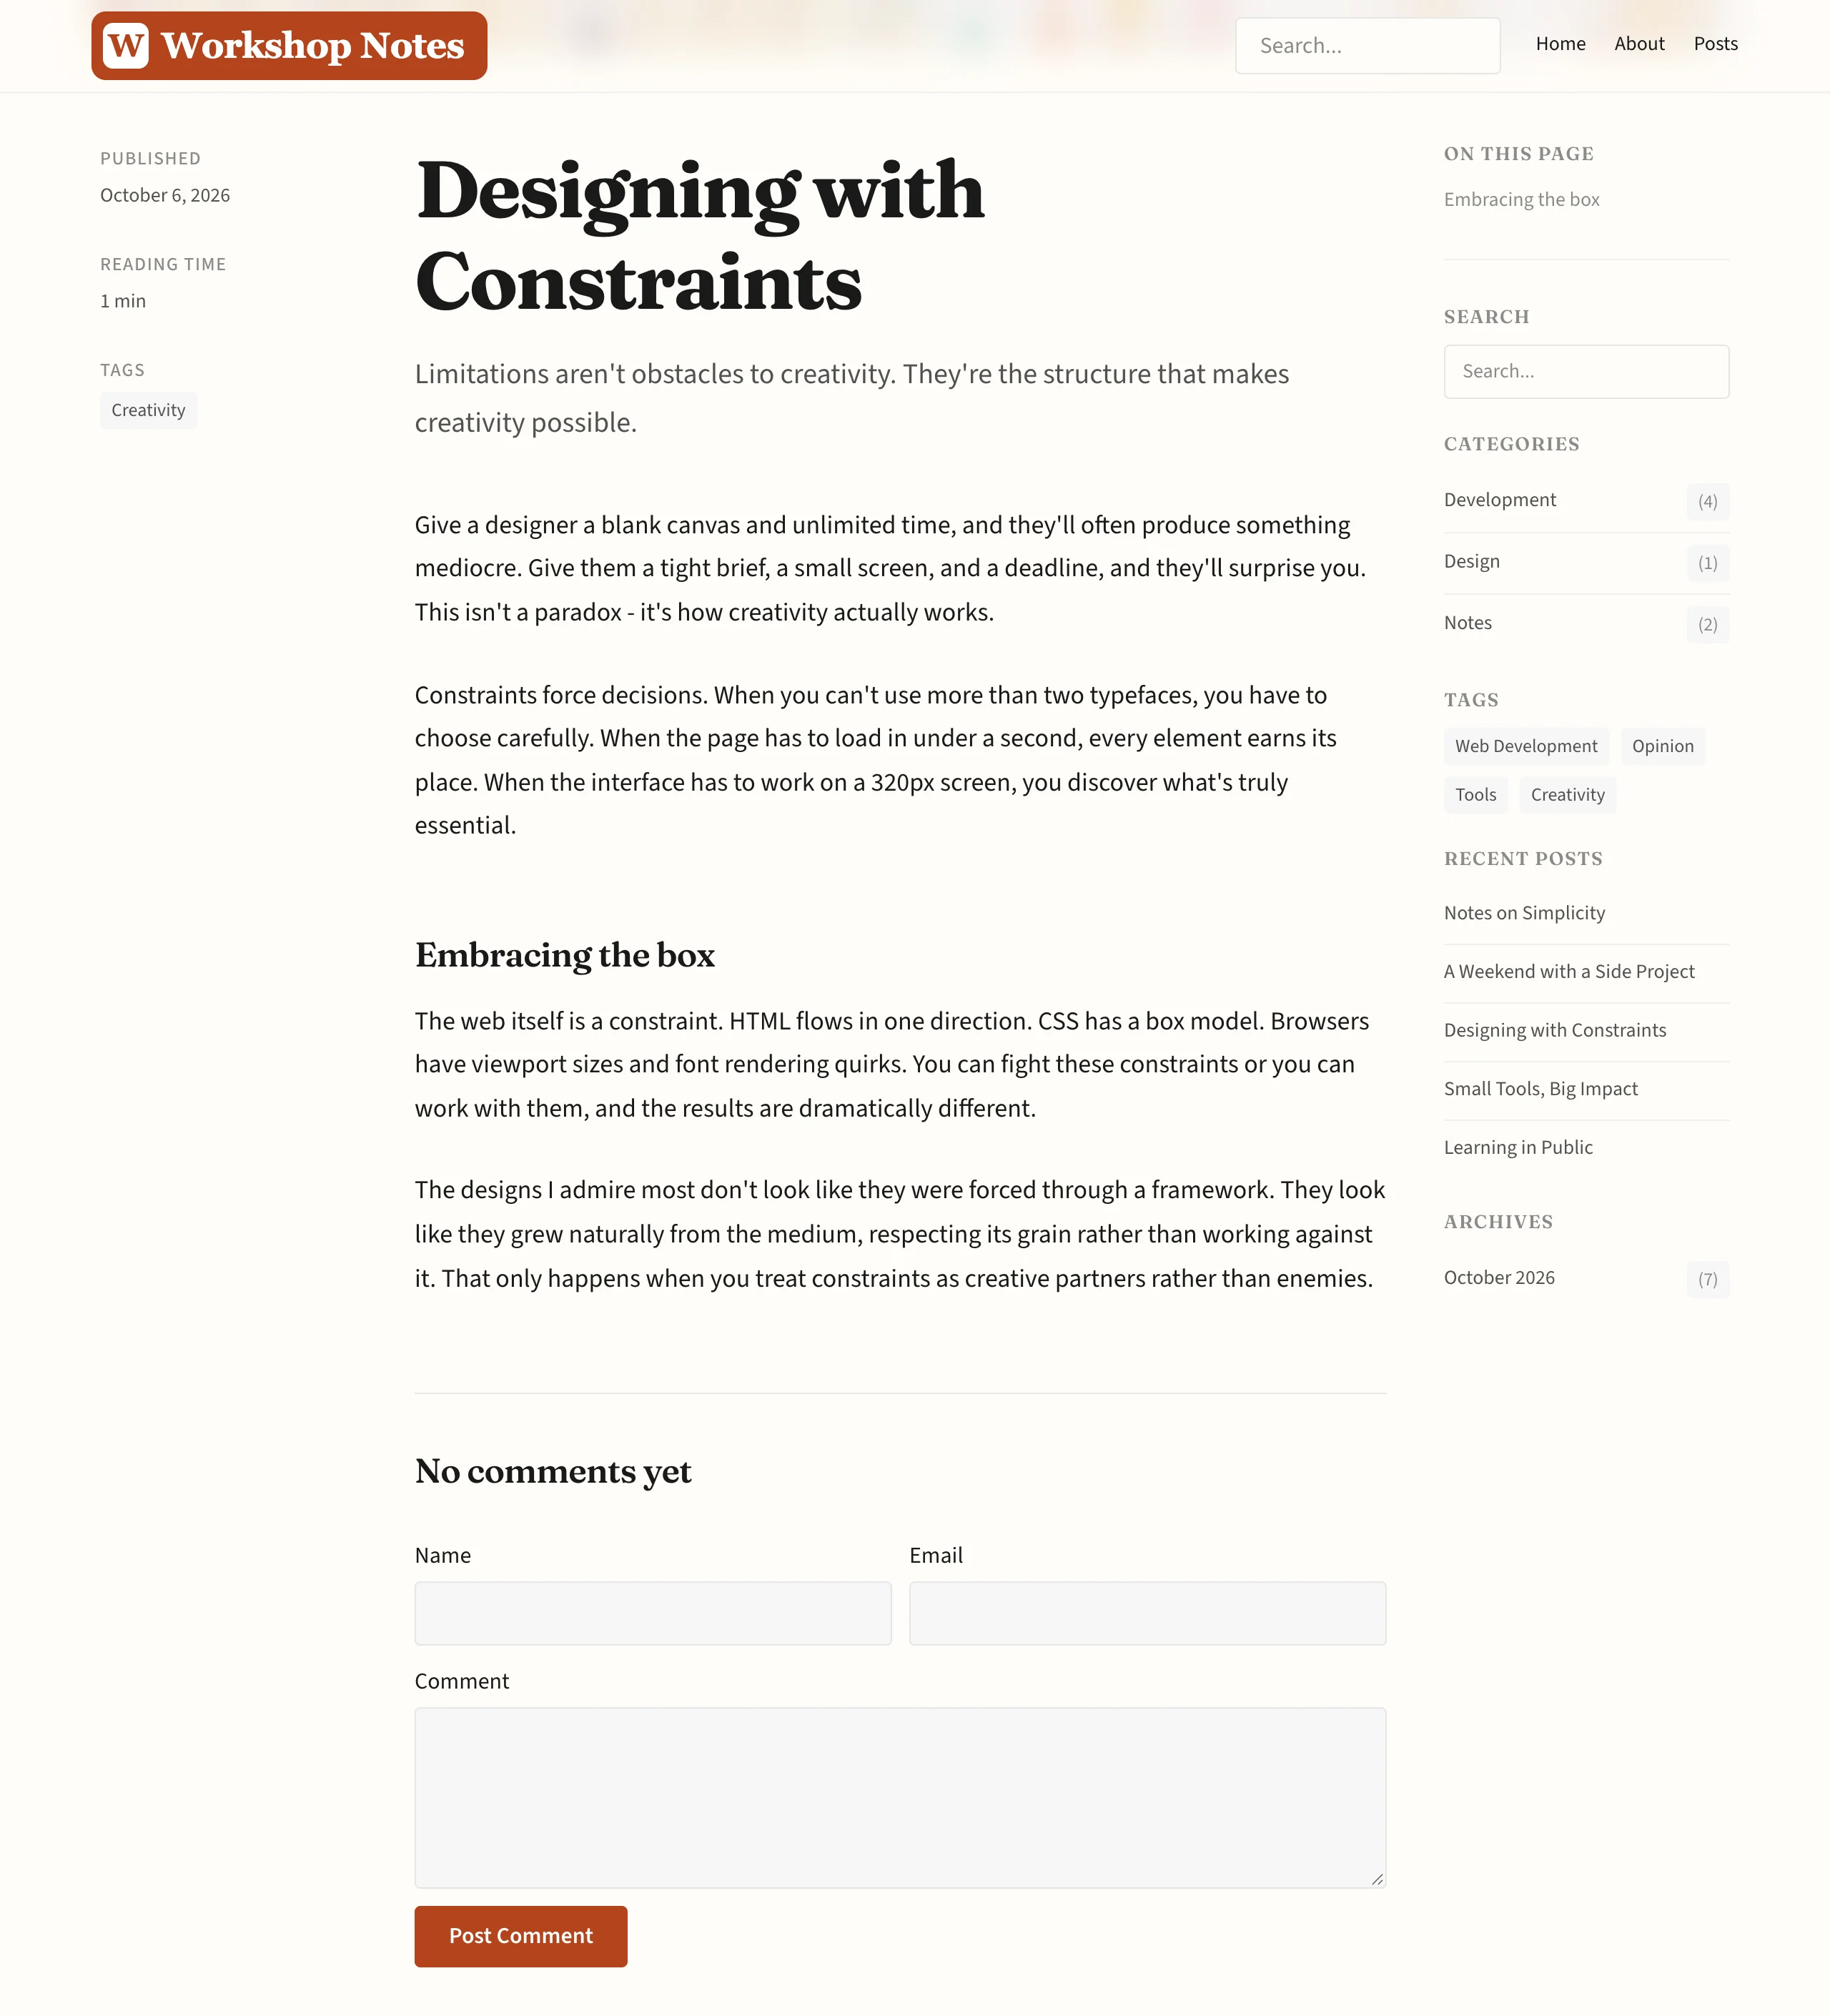
And after the changes from this article, with the logo, Fraunces for headings, Source Sans 3 for body text and terracotta as the accent colour:
You deploy the code changes the way Kevin described. With the Cloudflare template, npm run deploy builds the site and uploads it. With the Node template you build with npm run build and start the server with npm run start.
Logo, favicon, title and tagline don't travel with the deploy, though. They live in the database, and your local database doesn't move to the server. On the live site, upload the logo and favicon again in the admin and enter the title and tagline, because on 1.1.0 the setup wizard bug catches you there too.
Conclusion
Back to the question from the start. Everything that names your site works without code: title, tagline, logo and favicon. You set them under Settings → General, they take effect immediately, and because they live in the database you repeat them on the live site. How the site looks is code in three files. In theme.css you override the tokens from tokens.css, in astro.config.mjs you choose the fonts, and a separate heading font needs one extra line in Base.astro. All of that goes live with your next deployment, and the fonts then come from your own domain.

Comments
No comments yet
First-time comments appear once we've approved them. How we handle your details